Sunday, May 14, 2006
My first dai
Comparing the red oak from Taiwan with red oak dais I have from Japan, I can tell that the former is of very good quality. It is noticeably dense. I told to myself I would precisely measure this density but haven't done it so far.
The only concern I have is that the remaining stock is only mainly masame (straight grain), and very few pieces are oimasame (quarter sawn stock, more stable for a dai).
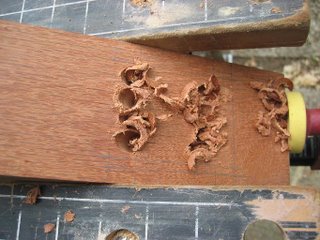
Drilling holes will be of great help in this hard wood.
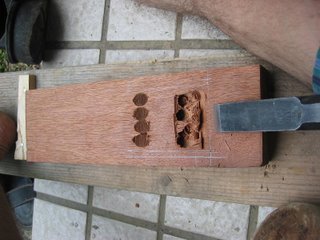
Start chopping.

Chopping in progress

Checking the blade width and marking it

Mouth chopping, a critical operation where it's so easy to ruin previous job. Mouth opeing is done after about 2/3rd of the chopping have been done on the other face.

Side cleaning (chopping at that stage looks like a mess, doesn't it?)

Sawing the side grooves
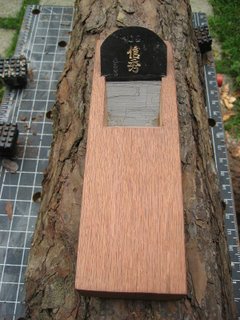
The cutting is finished, now remains to tune the sole.
For dai making, I recommend Jay Van Arsdale's detailed step by step explanation on dai making:
http://daikudojo.org/Classes/20060401/
I've seen it after my first attempt... Thanks Bob for the link!
Monday, May 08, 2006
Reading wood
It was in a really bad shape and had been probably in contact with water. The picture shows part of it in its original state.

Original condition of the Taiwanese Juniper.
But I decided to try to give the piece a new life.
I used a block plane, with a rather large mounth opening to first get rid of the outer surface, completely fibrous as if it had been teared appart, and to clean the brownish parts.
After this cleanup, I switched to a smoother plane, set to take fine shavings, as my experience in planing this wood indicates it may be unfriendly depending on the grain. And that is the topic of my post: how to find out about the grain, and what to expect when planing. I don't mean to write anything new, and I know you will easily understand. But I just want to make you aware of that fact so that you know how to work with the wood, and anticipate its behaviour under your blade.
So let's read, directly from the picture. It will be straightforward.
How about that grain?
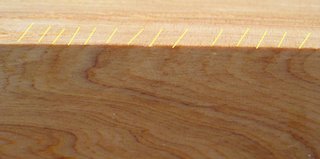
Ideal grain orientation
This grain is friendly, if you take it in the correct direction of course.
The grain on the foregound runs in a same direction (see the yellow lines I've added). The perpendicular surface planed easily and took a nice smooth finish.
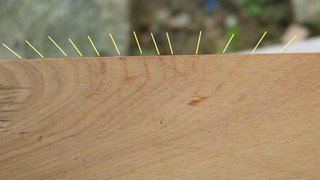
On the following surface, on the other hand, observe the grain. Do you see it changing direction? Well, the corresponding perpendicular surface was a pain to plane. Even with very fine shavings setting, well sharpened blade, I've got tiny tearouts. I had to plane with an angle, and I know that my subblade setting was not optimum.
Unfriendly grain orientation
Someone who is fluent in wood reading, will probably be able to see right away from which part of the tree this piece of wood came from. He will know which part should be exposed, either for the beauty of its grain, or because it will plane well and thus will feature a very nice finish.
Please note that I do not mean to act as a teacher here, this is not my goal neither my position. My writings here are just to illustrate what I figure out during my woodworking experiences. I may be wrong, and in that case, please let me know!
